Sunday, November 27, 2011

quick chicken quesadillas

i was looking for a quick and easy weeknight meal with some mexican flair, and i found it with this! super easy, simple, and quick.

ingredients:

9-12 oz refrigerated cooked Southwest OR Fajita flavor chicken breast strips
½ cup Old El Paso Thick n Chunky salsa
1 package (11 oz) Old El Paso flour tortillas for burritos (8 inch; 8 tortillas)
Cooking spray
2 cups finely shredded Colby-Monterey jack cheese blend (8 oz)
¼ cup sour cream

directions:
1. cut chicken into bite-size pieces.

2. in small bowl, combine chicken and salsa.
3. mix chicken and salsa.

4. spray one side of one tortilla with cooking spray. place sprayed side down in 10-inch nonstick skillet.

5. layer with 1/4 of the chicken mixture and 1/2 cup of cheese.

6. top with another tortilla. spray top of tortilla with cooking spray.

7. cook uncovered over medium heat 4-6 minutes, carefully turning after 2 minutes, until golden brown. 

8. repeat with remaining tortillas, chicken mixture and cheese. 

9. to serve, cut quesadillas into wedges. 


10. serve with sour cream and, if desired, additional salsa. i also served this with some rotel cheese dip.
(you can tell which quesadillas went in when the skillet was hottest!)
(served here with the infamous organic blue corn tortilla chips i constantly reference.)

i thought the quesadillas would be hard to flip, but it was quite easy! however, the trick is to load the chicken lightly. it looks light when you add the chicken, but you will have chicken in every bite. also, think of cheese as glue. don't skimp. i didn't measure out 1/2 cup for each quesadilla, but just kept the "cheese as glue" mentality going, and it really helped. of course... if you haven't noticed yet... there's no such thing for me as too much cheese.

next time i make these, i will follow the directions exactly for the hubs, but i may forgo the salsa on mine. i'm the kind of girl that orders my tacos with no lettuce or fixins, so that shouldn't be shocking. the hubs, however, LOVED these and has already asked me to make them again! THAT is success!

fin.

rotel cheese dip

i first became addicted to this when a dear friend of mine, ashton, made it for a party we had during our first year of law school. i couldn't believe how easy it was... or how much of it i consumed the first time i had it. i thought this was a pretty popular recipe, but i tried to find a version of it on allrecipes.com and couldn't. so i figured i would blog about it!!

this is perfect for tailgate parties, family get-togethers, if you have a hungry husband, OR if you have a beautiful chip and dip platter you're dying to use... hello, good excuse!

meet rotel cheese dip.

ingredients (there's only FOUR!):

1 can rotel with green chiles, partially drained
1 package velveeta, cubed
1 pound lean ground beef
1 package taco seasoning


(i'm still having trouble with sideways pictures. consider it exercise when you have to turn your head to look at the pictures.)

directions:
1. cube velveeta.

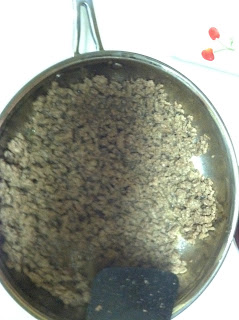
2. brown meat. drain fat.

3. stir in taco seasoning, and prepare meat according to package directions. (however, i cut the water back from 1/2 cup to 1/3 cup.)

4. in a large saucepan (or small crockpot), combine meat and rotel dip. gradually mix in cubes of cheese and allow them to melt. stir continuously, as the cheese can easily burn.

5. combine until cheese is all melted. reduce heat to low. allow dip to sit for a few minutes to thicken.

6. taste test.

7. done! serve with tortilla chips. (i prefer organic blue corn tortilla chips. they don't have as much salt so you get a full flavor of the chip instead of just tasting salt.)

fin.

Tuesday, November 22, 2011

broccoli rice casserole

i've been making broccoli rice casserole for awhile now, but this recipe had some variations in it that i thought sounded interesting. so glad i found this, because it replaces my old recipe!

first up, the ingredients:
2 packages frozen chopped broccoli (only one is shown here, but i get broccoli florets)
3 cups instant rice
1 can condensed cream of mushroom soup
1 can condensed cream of chicken soup
1 1/4 cups water
1 (16 ounce) package processed American cheese, cubed (i.e., velveeta)
1 tablespoon butter
1 bunch celery, chopped
1 large onion, chopped
salt and pepper to taste

once prep work is finished, your celery, onion, and cheese will look like this:


directions:
1. preheat oven to 350 degrees.
2. cook broccoli and rice according to package directions. (i LOVE steam in bag veggies. i stock up on them whenever they are on sale. that's what i used here.)
3. in a medium saucepan over low heat, mix cream of mushroom soup, cream of chicken soup, and 1 1/4 cups water.
4. gradually stir in cheese until melted. BE CAREFUL that the cheese doesn't burn. (this requires constant stirring.)
5. while adding in the butter, try not to eat all the pieces of cubed cheese. when you are sneaking pieces, make sure that nobody sees you. this is the most challenging part of the entire recipe...
i got caught...

moving on...

6. melt butter in a large skillet over medium-high heat. saute celery and onion until soft.
7. in a large mixing bowl, combine broccoli, rice, soup and cheese mixture, and celery and onion. season with salt and pepper. once combined, pour mixture into a 9x13 baking dish. (i poured mine into one of my pyrex dishes that has a lid. i knew it would make leftovers, so i put it in here to double as a baking dish and storage.)
8. i added some cheese on the top. the recipe didn't call for it, but i don't believe in broccoli rice casseroles without cheese on top. it's against my religion.

9. bake in the pre-heated oven for 45 minutes, until bubbly and lightly brown.

i consider this a major upgrade from my old recipe. my old recipe was really inconsistent... mainly b/c i had it all in my head so it never wound up the same both times. (if you knew what the inside of my head was like, you would understand.) i will keep this one as a staple. it also makes GREAT leftovers and is great for taking along to work for lunch. all my co-workers were jealous. :)

it makes an entire pan, so this is also great for family get-togethers. i will eventually take this to a family reunion or thanksgiving or christmas and see how the family enjoys it. try it on yours and let me know how it turns out!

fin.

Monday, November 21, 2011

slow cooker chicken and dumplins

my mom's chicken and dumplins is a family favorite. i ask for her to make either that or her homemade lasagna every year for my birthday. i blame her for my obsession with cooking... and for being a chubby child. but, back to the point, if she were to ever show up to a family reunion or holiday without chicken and dumplins, she wouldn't be allowed in. thankfully, she's never been bold enough to dare. i wouldn't want to see what would happen if she did. but i attempted this slow cooker version of mom's classic. admittedly, this is not even in the same ballpark of good as my mom's dumplins. and it will never be. it takes HOURS to make mom's chicken and dumplins. she mades her dumplins from scratch and has many special secrets to her dumplins recipe. BUT these are pretty good. if i had never had my mom's dumplins, i would say these were probably the best i've ever had. but i'm fortunate enough to have a super cook for a mom. after all, her maiden name is cookston. if she wasn't a good cook, it would be a disgrace to the family name.

and as a sidenote, they are dumplins. not dumplings. this is a southern dish, and we say it using southern words. i.e., DUMPLIN. don't correct me on that. because i'm right.

ingredients:
3-4 boneless skinless chicken breasts
2 cans cream of chicken
1 can chicken broth
1 large chopped onion (i used 1 1/2, but my husband LOVES onion)
1 (16 1/2 oz can) homestyle biscuits
salt and pepper to taste (although i didn't use any)

directions:
1. mix chicken, soup, and onion in crockpot.

2. cook on HIGH for 4 1/2 hours. if you place your chicken in frozen, it may take some extra time. the test is when the chicken is fall apart, fork tender.

2. open up your can of biscuits. i prefer thinner dumplins, so i took each biscuit and flattened it out. if i had a rolling pin, i would have used it and added a little flour to the dough to keep it from sticking, but i didn't have a rolling pin... and i didn't want to be super messy, so i just took each biscuit and flattened it out using my hands.
 i had help...

3. tear each biscuit into pieces. if you flatten out the biscuit, you can usually get around 10-14 pieces per biscuit.

4. throw each piece into the pot. cook for about 1 hour on HIGH. stir often to keep dumplins from sticking.


once it's finished, you're going to have everybody coming to the kitchen, because they'll smell it from a room away. want proof of that? here ya go...

 and the finished product!

not to throw my husband under the bus, but he actually told me he thinks he likes my dumplins better than my mom's. i'm not that naive. he's just trying to rack up good hubs points. and if my mom reads this, he may be in the doghouse with her... but he's in the big house with me, so it all works out fine.

fin.

Sunday, November 20, 2011

beef and bean crescent pie

this recipe turned out soooooooooo good!! i even brought leftovers of it over to the in-laws for sunday lunch, and it got gobbled up! try this with some tortilla chips (i like the blue corn kind) or fritos. it's not a dip, but it pairs well with something crunchy. i couldn't believe how unbelievably easy this was or the fanfare that it received. this is a crowd-pleaser with mexican flair.

ingredients:

1 - 1 1/4 pounds ground beef
1 (1.25 ounce) package taco seasoning
1/3 cup salsa (i didn't measure. i just eye-balled it, but i probably used more like 1/2 cup.)
1 (8 ounce) package refrigerated crescent rolls
8 ounces cream cheese, softened (i used light and it turned out great)
1 can refried beans
2 cups Mexican blend cheese

directions:
1. unroll crescent roll dough. press dough onto the bottom and up the sides of an ungreased 13x9 baking dish. be sure to seal perforations.

2. in a large skillet, cook the beef over medium heat until no longer pink; drain the fat.

3. add taco seasoning and salsa.

4. simmer, uncovered, until thickened.

5. while the meat mixture is thickening, spread cream cheese over the dough. the recipe called for 4 ounces. i used more than that (probably 6 ounces), but i didn't empty out the container. but i probably could have. just spread it until the dough is generously covered. feel free to use all 8 ounces. :)

6. stir the refried beans into the beef mixture until warm.

7. spoon beef mixture over cream cheese layer. (i must admit, this looked kind of gross at this point, but just trust me. the outcome is great!)


8. bake, uncovered, at 375 degrees F for 20-25 minutes or until crust is golden brown.

9. remove from oven. sprinkle with cheese. 

10. bake 5 more minutes or until cheese is melted.

although the middle steps look pretty disgusting, i can assure you, the end result is DELISH! as i said before, this is a crowd pleaser. it's like mexican lasagna but creamier. i also appreciate the few ingredients and little time involved. makes for a great weeknight dinner AND the leftovers taste even better. i swear! yum, yum, and yum. try it. tonight. :)

fin.